Monday, September 23, 2013

REVIEW: Presonus Firepod

NOTE: This review is truly ancient history, as in 2002 (back in the end of the Digidesign 001 days). The Firepod is gone, replaced by the FireStudio Project in the Presonus product line. I have long left Presonus A/D/A’s behind, but my unit served me well for at least 5 years before I sold it. A couple of features quit working (SPDIF and one channel’s trim control became unusably noisy) near the end and, as Presonus products so often do, I heard a lot of bad reports from others who used this unit and a few found that it met expectations. It is fragile, no doubt. Presonus is not known for making durable products and you should not expect this unit to survive ham-handed operation in any fashion.

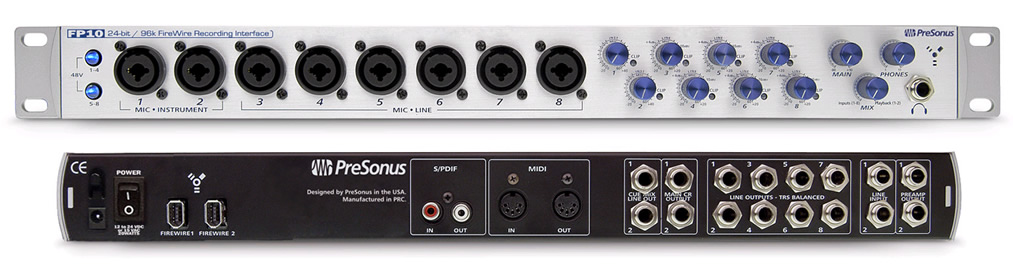
I purchased my Presonus Firepod practically the moment it became available at my local Guitar Center.  I paid $480 for the unit and put it to use immediately.  I immediately took a load of crap from other engineers for even considering such a low-priced piece of equipment, especially from Presonus.  I have to beg to disagree. 

First, I disagree that there is some inherent defect in the Presonus design philosophy.  I happen to believe that being quick, clean, and quiet is all a microphone preamplifier should be.  Others believe that a microphone preamplifier should have as much personality as microphones.  Presonus takes the less trendy approach and their engineers have created a collection of products that are, essentially, invisible to the record chain.  That works for me, but it may not be your cup of distortion.

The Firepod is one of the most successful Plug 'n Play devices I've ever experienced.  My Mac G4 and My WinXP laptop recognized and incorporated the Firepod seamlessly and flawlessly.  Unlike ever other piece of equipment I've added to either of my systems, the Firepod simple worked from the moment I connected the Firewire cable to the computer.  Even my old PC standby, CoolEdit Pro v1.2, snagged the Firepod device and was able to record, multi-track, without any difficulty.  Personally, I think this is a testament to both the Firepod and CoolEdit, since the software hasn't been updated since 2001 when Adobe bought Syntrillium and renamed CoolEdit "Audition." 

The eight microphone preamplifiers have 60dB of gain and can be used as either line amplifiers, mic pres, or instrument DIs.  The first two channels incorporate inserts, so external equipment (such as EQs, compressors, or alternative mic pres) can be inserted into the analog signal chain. 

The Firepod's outputs are equally flexible.  The back panel offers balanced main, cue, eight line (group) outputs, SPDIF, and MIDI outputs.  A pair of Firewire connectors complete the rear panel.  Up to three Firepods can be connected to create a 24-channel recording system.  One SPDIF channel pair can be used along with the included channels, upping the max record chain channel count to 26. 

I use Digidesign's 001/002 and the Firepod and my preference is toward the Firepod, both for sound quality and flexibility.  Since writing this review, I've run into several golden ear recordists who share my opinion.  If quiet and clean is your recording objective, I think you should consider the Presonus Firepod.

Saturday, September 21, 2013

A Legend in My Mind

I can not remember a time in my musical life when Leon Russell was not an inspiration, intimidating as hell, a giant source of musical insight, and producing the best music of his time. We had the total luck of getting to see him close and personal a few years back (with this band) at a small club in Maplewood, MN. He was just recovering from a heart attack and still put on a several hour show that knocked us out. Nobody has ever done more with less than Leon Russell.

Wednesday, September 18, 2013

Resonance on A Plate

This is one of my favorite demonstrations of resonance in an "enclosed space." The space is, of course, the plate. The lines are formed where the plate is NOT moving, so the salt/sand is moved away from the moving portions of the plate to the stationary locations. As the frequency changes and the associate wavelengths change (determined by the mass and elasticity of the plate material), the patterns move toward the next resonance. Since this is a 2D "room," the more complicated modal patterns in a 3D room are not present, but there is plenty of complexity in 2D for us to enjoy.

Monday, September 16, 2013

REVIEW: Shure E2c In-Ear Monitors

shure_1I'm slow to adapt to fashion and trends.  I've been wearing 2nd hand jeans since 1973 and I've passed through periods of trendiness and tackiness during that 30+  year interval without changing my habit.  It's not that I'm specially cantankerous, I just don't care what other people think.  Decades ago, SF writer Ted Sturgeon convinced me that "90% of everything is crap"; although I think Ted was an optimist.  The opinions of most folks are based on ignorance and the human herding instinct and I can't think of a reason in the world why anyone with half-a-brain would be interested.

All that said, I've viewed the iPod revolution with revulsion.  No, I'm not convinced that MP3 files are unlistenable.  In fact, I think as a consumer format MP3 files at low compression ratios are as good a format as consumers have had ever in history.  I do, however, dislike the hardware related to iPods.  The iPods, themselves, are disgusting pieces of audio crap, producing high levels of a variety of distortion components and low levels of unclipped output for the collection of really awful transducers typically connected to the output. 

As a writer who often works in less than ideal environments, including my own kitchen where my wife feels an overwhelming desire to interrupt my work any time she passes through the room, I've been on a long search for a small, comfortable, and decent sounding headphone for years.  Every couple of years, I give up on my most recent awful compromise and try another miserable earphone product.  I've suffered a variety of Sony failures (excluding a wonderful set of ear buds that I managed to lose in 1991 and for which I have never again found a replacement), Koss ear buds of every variety, and some expensive in-hear monitors that will remain unnamed to protect the reputations of folks who should know better. 

This year (2008), I coughed up another $100 for a pair of Shure E2c in-ear monitors.  My first impression was pretty awful.  Not because of the phones, but because the instruction manuals came in every language but English.  I had to go on-line with www.shure.com to find instructions in a language I most understand.  What's that about? Is the English-speaking world really that insignificant? 

The E2c's are odd shaped.  Fitting them to your head and ears is not intuitive, at least it wasn't for me.  I think they best fit when the cable is run behind your head.  There is a cable sleeve that can be snugged to your neck, helping to hold the phones in place after they are fitted. The cable appears to be very heavy duty and the 2-year warranty is probably an indication of how durable the cable actually is; cables being the usual weak point in this kind of audio equipment.  To get these phones in place, you pretty much have to screw them into your skull.  If they are fitted slightly off center of the ear canal, a look in either direction will shift the image and, sometimes, mute one of the phones.  When you find the right sleeve, though, the seal is solid and independent of movement. 

I pretty much expected to hate these things as much as I've hated every other ear phone experiment of the sort, but I was disappointed/surprised/amazed on the first listening.  After wrestling with the smoother, more comfortable silicon ear sleeves, I settled on the stiff foam ear plugs and found a combination of positions and cable routing that worked for my ears.  Rolling the foam up like industrial foam ear plugs, I managed to insert the driver far enough into my ear canal to keep the phones in place and on-axis with my ear drum.  Once that engineering task was finished, I began to experiment with listening material.

Listening to 320kbps MP3 files through my laptop computer, using Microsoft's Media Player was unimpressive.  Almost awful, in fact.  Everything seemed harsh, brittle, and a lot edgier than I remembered.  If I had needed to make a decision about the E2c's at this point, I'd have said they are tinny, distorted, and harsh.  I didn't, however, so I moved on to better sound sources.  Moving the exact same files to my Sony CD/MP3 player, I found that those tunes sounded much more rich, more dynamic, and less flawed than on the PC.  I didn't expect that, so I went back to the original source files, 44kHz/16 bit CDs.  Everything I disliked about the MP3 files moved even further to the background and the imaging became sharp, pleasant, and more detailed.  The bass, however, needed some EQ to find a balance.  I decided to drive these sensitive, relatively high impedance units with my home system, which includes a Hafler FET power amplifier.  The phones produced an even more focused, more pleasant, tighter, and more detailed sound, which totally surprised me.  What this indicates is that the E2c's are accurate enough to reproduce relatively minor (compared to most ear buds) differences in sound sources.  That's an accuracy not often found in this kind of product.   

This EQ requirement I noticed with the CD player was partially true because I was able to listen comfortably at dramatically lower levels than I do with most phones.  The upside to this is that I have found myself wearing the Shures for hours without fatigue or loss of enjoyment.  My 58-year-old ears are becoming very sensitive to volume, so this has multiple advantages.  After a morning of writing and listening to music, I suffer no tinnitus effects and I've enjoyed hours of acoustic isolation and productivity. 

Headphones are incredibly personal.  The phones that I like, or love, can easily be the phones you hate.  I haven't yet decided that I "love" the E2c monitors.  I do like them for the moment and that is about the best thing I can ever say about this kind of equipment. 

2010 Update: While I still like the sound of the Shures, the reliability has been suspect. I'm going on my 3rd pair (all in warranty) of the E2c set I bought in 2008. Both failed sets failed the same way; attenuated output from the right earpiece. The cables are not damaged. There was no obvious wax in the ports, but the output suddenly dropped about 12-15dB only on the right side. Shure's warranty policy has been terrific, but the downtime is irritating.

Rock the Future

Monday, September 9, 2013

REVIEW: Echo Indigo I/O PCMCIA card

NOTE: This review falls into the “ancient history” category of audio products. PCMCIA is absolutely history today. Echo Audio is all-but a non-entity. But at one time, both this company and their PCMCIA products were indispensible to a working audio professional. It’s a rough and competitive world out there and a whole collection of long-dead companies attest to that.

echo_i1The Echo Indigo I/O PCMCIA card is an absolute necessity for anyone using a laptop for audio editing.  The Indigo is compatible with Mac OSX and Windows XP-b ased machines.  The Indigo has a stereo in-output with eight "virtual outputs" available for use through the Indigo Console.  This allows a mixer to group signals and route them through effects as if the I/O were a real mixer with external busses.  Or, using Rewire, it allows several audio devices to be routed to the virtual mixer where the combined outputs will arrive in sync and in good condition at the stereo output buss.

The I/O has a pair of 1/8" stereo jacks, unbalanced input and output, that are located on the sides of the module, along with a rotary volume control for the output.  The I/O is capable of 24-bit, 96kHz recording and playback.  The unit has a slightly higher than many laptop soundcards' output and is considerably lower distortion than the majority of such equipment.  The max output is -10dBV (.308V), so the output power is limited to a few milliwatts, but that is usually enough to provide a workable output with most high efficiency headphones and in-monitors. 

It is expensive, however.  About $380 list and $250 street for the I/O version of the Indigo.  There are, though, several versions of this unit which either don't include an input or provide other functions. 

The average laptop, including Apple devices, are noisy due to their proximity to and lack of immunity from the high emissions computer power supplies. Many laptops have notoriously flawed and unreliable internal audio devices (Toshiba and Sony Vaio laptops come immediately to mind).  The Indigo provides the laptop user with an opportunity to escape the low-fi world of laptop computer audio and makes a portable audio workstation considerably more powerful.   

Hardware Features

Software Features

  • 1 stereo 1/8" analog input
  • 1 stereo 1/8" analog output
  • Supports full duplex 2 channel in, 2 channel out operation
  • High quality headphone amp
  • Analog volume control knob for output
  • Supports true 24 bit, 96 kHz audio
  • 100 MHz 24 bit Motorola DSP
  • Powered by your notebook computer
  • Includes 6 foot adapter cable for RCA and 1/4" connections
  • Type II Cardbus slot required
  • Software console for monitoring, metering, and setting levels
  • Built-in digital mixer provides near-zero latency monitoring
  • Supports Windows Me/2000/XP and Macintosh OS X (Jaguar & Panther)
  • Supports pro audio software (WDM Kernel Streaming, ASIO, GSIF, and CoreAudio)
  • 8 "Virtual Outputs" - run multiple applications at the same time
  • Low-latency drivers

Saturday, September 7, 2013

Bigger is Always Better?

new console I had a weird confluence of audio technology moments this past week. #1 One of the guys who has haunted my Minnesota audio life was amazed at the fact that Behringer and Presonus make “under $5,000” digital consoles. He was raving about the fact that he never imagined he’d be able to buy a 24-channel digital console for his budget in his lifetime. #2 The school where I used to teach bought an Avid D-Show console and one of the kids who will use that system on a regular basis posted a picture and mini-rave about the features available on his new toy. #3 I heard one of the worst sounding shows from one of the best bands ever butchered by a sound system in an outdoor venue that had no excuse for being anything but terrific. That show was “mixed” (to abuse the term) on an Avid D-Show. #4 A guy who I respect a lot advertised his upcoming analog audio class with the claim “once we master the discipline of 4-tracks, we'll do some 24-track sessions.”

When I replied to the first guy’s rave about being able to buy a “large scale” console for less than a grand, I said something along the lines of “you get what you pay for.” 24 full-featured channels with automation, dynamic processing, EQ, and other toys for less than $1,000 means some really cheap and unreliable components have been used in the design. Like it or not, great faders still cost about $100 each and pretty good motorized faders (digital or analog) are still $40 each in quantity. Do the math and you’ll see that nothing in the “pretty good” category can be used in the product we’re discussing. He replied with a rant about how I’m not only a motorcycle “bigot” (for considering cruisers and big, blubbering twins to be the awful engineering botch-up they are) but an audio bigot because I have some quality standards there also.

I always take his insults with a block of salt because he is about as close to stone-deaf as a human can get and still carry on a conversation. Still, his fascination with more gear than he can figure out how to use was a reminder of how goofy the live sound business has become. Pretty much everyone has to have a 24-or-more channel digital console to call themselves “professional” and hardly anyone knows how to do a guitar-and-songwriter folk act in a small coffee shop without fucking it up.

Which leaps us to #4 above. The idea that anyone living today is capable of mastering “the discipline of 4-track” recording is laughable. Mastering anything is a lifetime accomplishment and spending a few hours watching someone else play with a 1/2” tape deck won’t get students anywhere near being basically competent, let alone in the master territory. The same goes for these large-scale, over-featured live sound consoles. If you can’t do a decent simple show, you have no chance in hell of doing any better with more equipment than you know how to use. My deaf friend, for example, wouldn’t know where to start in creating a balanced mix if he only had to balance a voice and an acoustic guitar (very much like the deaf guy who is in charge of screwing up the sound at First Avenue). Adding dynamics, time-based processing, and dozens of channels and signal-path options would only make anything these guys do . . . worse.

So, I think it’s safe to assume that live music is only going to become more of a punishment than entertainment and the only revenue stream available to modern pop musicians will dry up like recorded music sales. Someday, I can only hope that musicians will discover that “less is more” in the sound reinforcement world, just like it is everywhere else in human activity.

Friday, September 6, 2013

Analog Tape Deck Alignment and Calibration

homepic[1] There are more than a few pretty good references on the internet describing the techniques for analog tape deck calibration. Before I list several that I believe are excellent resources, I have a few of my own comments to add to the history of this procedure. I’m not interested in reinventing the wheel, so I’m only going to add what I think might have been left out of the reference links found below.

There is a world of difference between consumer 1/4” (or 1/8” cassette) quarter-track machines and professional 1-2” 4-24 track equipment. Many of us first learned basic maintenance on 1/4” reel-to-reel semi-pro equipment before moving on to the real thing (pun intended) and we brought our toy-gear habits with us.

One of the first places that transfer will rear its silly head is in our procedures for cleaning heads and rollers. A small roller, like that found on the old Teac 3340 or Otari 5050 machines, can easily be cleaned with a cotton swab or two. Since the rollers are easily damaged (the oils extracted) by carbon-based cleaners (alcohol, TriClor III, etc), a cleaner designed for use on these materials is required. The most commonly available appropriate cleaner is mild soap and water applied to a clean, lint-free rag and some serious elbow grease. I recommend a near-white rag and that you keep cleaning until the rag stops removing material (which will be a while if the previous users attempted to clean the rollers with cotton swabs). Other techs have recommended MG Chemicals Rubber Renew, Caig Lab’s RBR100L Rubber Cleaner and Rejuvenator, Texwipe TX134, and American Recorder Technology’s S-21H Tape Head Cleaner. I, honestly, have used soap and water for the last 35 years and have no experience with other cleaners.

Likewise, most semi-pros started using cotton swabs and isopropyl alcohol to clean heads. The cotton swabs are, probably, fine if they are wooden stick swabs intended for non-hygienic applications. Plastic stick swabs sometimes decompose when exposed to head-cleaning chemicals, like isopropyl alcohol, and deposit gunk on the heads. While I am perfectly happy using cotton swabs on most professional heads, I’d prefer to us something like the Calrad Video Chamois to minimize abrasion and maximize surface area on large heads. Isopropyl alcohol is a perfectly acceptable cleaning chemical for this application as long as you don’t cheap out and buy “rubbing alcohol.” Additional chemicals and water are added to rubbing alcohol and I can’t guess what those contaminates will do to your expensive, hard-to-find, easily-damaged heads.

The “easily-damaged” bit is important to note, also. It doesn’t take much of a contaminate to turn a cleaning session into an abrasive head-damaging catastrophe. If you drop a swab on the ground, throw it away. Don’t risk scrubbing your precious heads with a bit of sand, dust, metal, or anything that might damage the heads’ surface or the gap. Some of the last generation of decks had heads that were nearly indestructible, except for the epoxies used for the gap. A bit of magnetic or conductive material ground into the gap and you’ve lost the ability to calibrate one or more tracks.

Professional tape decks all have mechanical calibration and maintenance procedures detailed in the owner’s manual. I recommend you follow those procedures, completely, ever 4-5 calibration sessions. There is no point in making sure your deck is perfectly calibrated and aligned if the deck can’t hold speed accurately, the tape lifters don’t quickly remove the tape from the heads during rewind or fast-forwarding, or if the tension between the capstan and take-up or supply reels is improperly calibrated and causes either lash or stretch in your tape. Every step of the transport calibration procedure is there for a reason and you should buy into those reasons and perform those procedures occasionally.

Detailed resources with near-step-by-step procedures and more information can be found at these locations:

Wednesday, September 4, 2013

Madness to the Method – Gain Structure

NOTE: This article was sent to me by the author, Mark Amundson, several years ago to use in my Audio Engineering classes. The article had been on my website as a link in the original Microsoft Word format for a decade. Unfortunately, Mark’s article seems to have vanished from FOH Magazine’s article history, which is a huge loss for audio engineers who actually care about optimizing distortion and noise characteristics in their signal path. A version of this discussion is included in his book; Live Sound Practice and Theory.

Manuscript: Madness to the Method – Gain Structure
Magazine: FOH
Manuscript Type: Technical Article
Issue Assignment: May 2003
Word Doc No: GainStructureMadness.doc
Figures: -
Photos: One
Editor: Bill Evans
Revision: -
Date: 05/12/03
Word Count: 1516

Madness to the Method – Gain Structure

By Mark Amundson

In this dissertation I am going to do a little Q&A, ala the old Audio Cyclopedias about questions you may have wondered about, but just did what you were told. I am going to throw down a generous helping of electronics history as a way of answering the question, and to remind us all were all this technology came from.

Q: WHY IS 0dBu THE REFERENCE SIGNAL LEVEL?

The question could easy re-phrased why is 0.773 volts RMS (0dBu) the standard and not some other convenient number like 0.1, 1, or 10 volts?

The answer goes way back to Alexander Graham Bell’s era when no such thing as radio or broadcasting was thought of. As the “Bell System” and “American Telephone and Telegraph” (AT&T) became the monopoly in the phone service industry, Western Electric Company was formed as a subsidiary of the Bell System to design and produce telephone gear for the whole country. After much trial and error, a standard two-wire pair transmission line was developed with 600-ohm source and load impedances to maximally send carbon microphone signals down the wires. With the right construction materials, voice signals (about –20dBu) could transit 5 miles with a passable loss of signal amplitude.

When Lee DeForest invented the Vacuum Tube Triode for signal amplification, his “killer app” was re-boosting feeble telephone signals, thus creating long-distance phone service in the second decade of the last century. Western Electric still had a lock on the electronics industry in the 1920’s as broadcast radio was just emerging, so naturally it had the highest technology suitable to fulfill civilian and military requests for standard “Public Address” apparatus. By the early 1930’s Western Electric had the first quality dynamic microphone (requiring no DC power unlike carbon mics) and combined vacuum tube amplification connected to the first efficient “loud-speaking apparatus” that we now know as horn loaded drivers.

As broadcast radio became widespread, and specialized companies like Electro-Voice, MagnaVox, and Shure Brothers came to supply (with Western Electric) the needs of public address and broadcast gear, the 600-ohm line cabling still held as the lowest loss method of distributing and processing audio signals. From that era, a one-milliwatt reference level into 600-ohms became the reference level, or 0dBm (zero deci-Bels referenced to one milliwatt). 0dBm is exactly 0.773 volts RMS, but as technology marched on audio electronics moved from power matching to “bridging” impedance matching, the 0.773 volts without any specified load impedance was now described as 0dBu (zero deci-Bels unreferenced).

To answer the lingering question of what became of Western Electric, government anti-monopoly policies in the 1930’s forced the breakup of AT&T (the first time) into RCA for broadcast, Bell Labs for telephony, and All-Technical Products (Altec) for public address. Altec slowly became Altec-Lansing, then split back to Altec and James B Lansing Inc., then on to JBL.

Q: WHY GAIN (TRIM) TO LINE LEVELS AND THEN MIX AFTERWARDS?

This question is more math than history, but we still thank the early broadcast pioneers of the 1930’s for the first work on defining signal-to-noise and noise source definition. This question could also be formed as what is the best method to minimize hiss in the mixing console?

The answer comes from the invention of the radio, and techniques used to maximize signal-to-noise ratio; and thus transmission distance. As a signal is created, processed, and sent to its final destination; there is a signal-to-noise ratio (SNR) degradation. As each stage, or processing block passes on the signal, the noise eventually encroaches on the signal level. The number of dB drop of SNR per stage is defined as its noise figure (or noise factor for you dB challenged). A noise factor of 6dB or less per amplification (gain) stage is considered a low-noise design for a preamp.

To better visualize this idea, lets put some example numbers to work. If a typical dynamic mic and voice put out –50dBu signal peaks, and the console’s referred input noise is –128dBu, you have a 78dB SNR which is respectable in live sound applications. As the signal proceeds through the channel mic preamp, eq section, channel fader or VCA, summing amps, master fader, and balanced line driver, there is a noise figure penalty to be paid. The good news is if two gain stages are cascaded together, the noise figure of the first stage dominates with the second gain stage noise figure effectively divided by the gain of the first. What this means is that cheaper electronics can be used after the mic preamp, with a high gain preamp covering for the sins of the rest the console’s electronics.

On other item to be shared is that attenuation circuits (eq filters, faders, pots, VCA’s, etc.) can generally be assumed to be direct losses in SNR, with every dB in attenuation a corresponding dB increase in noise figure. So the theoretical perfect (low noise) mixing console setup would be faders maxed, eq flat, and amplifier gains a perfect match between mic level and power amp full power sensitivity.

But no realistic scenario exists on a mixer without faders to “mix” with. So the next best answer is take your desired loudest channel in the mix, set its preamp gain control (gain, trim, etc.) for about 0dBu average level, and keep the channel, group, master faders reasonably high, but preserve some headroom for the occasional “louder” demand. This minor compromise yields the best SNR while still giving mix flexibility. This practice also applies to the gain of all the other signal source channels, but with the obvious idea that their faders would be more attenuated.

Q: WHY IS +22dBu THE COMMON MAXIMUM LEVEL

This answer also comes from electronics history, but only a half-century back. The dawn of the first mass-produced transistors had a typical maximum voltage level of 30 to 40 volts. Of these early transistors, many were targeted for industrial controls and “analog” computers for military and aerospace usage. The most common analog computer section was the “operational amplifier” or “op-amp”. Because these op-amp sections were designed to be near perfect mathematical gain stages with both positive and negative voltage swing capabilities. By taking the limitations of the transistors plus the need for a bi-polar (plus and minus) power supply, the standard of +/-15 volt supply levels was instituted, and is still used today.

As transistors got grouped on one silicon die, integrated circuits (ICs) were born with the first standard products becoming IC op-amps. As IC prices dropped in the late 1960’s and early 1970’s, more IC op-amps started finding there way into audio equipment, still requiring their +/-15 volt power supplies. Today’s pro-audio signal processing and mixing gear is largely composed of IC op-amps and a few application-specific ICs plus just a few necessary un-integrated transistors. The common legacy of supplying them with +/-15 volt levels still exists, with op-amps capable of near +/-14 volt audio signal swings. This level translates to about 10 volts RMS, or +22dBu at which the circuits would exhibit clipping of the signals. Some math trickery maybe also in maximum output specifications as you can gain another 6dB in level by stating the output as balanced; in which each balanced output contact swings in opposite polarity to double the levels.

With the above explanations that we should set our levels close to 0dBu and keep away from the clip levels around +22dBu, there leaves plenty of headroom for classifying what peak signals can be and what is required to get the drive channels (eqs, crossovers, and power amps) to full output. Most power amp manufacturers set their sensitivity values to around 0 to +9dBu for full unclipped speaker drive. By keeping the post pre-amp levels at or below the power amp sensitivity values, mostly assures a clipping free production. Of course that relies on your keeping the power amp input attenuator controls full up. You do not want to be “low-noise” all the way to the amp, and then throw away all that SNR at the last attenuator do you?

FINAL WORDS

Our latest generation of audio production personnel deserve to be educated on how we use our gain structure procedures, and why these methods came about. Some may argue about exact levels and forming up mixes, but I am coming at this from an electrical engineering view and attempting to shine light on what the design engineers consider optimum use, rather than operator tactics “that seem to work for me”. We need to appreciate that live sound borrowed heavily from the telephone and radio broadcast pioneering work, plus how electronics achievements impacted our practices. The twentieth century could be termed the “electronics” century, and it looks like the twenty-first century will be the “photonics” century; with fiber-optics promising near unlimited bandwidth for passing analog or digital signals from baseband to radio-frequency to optical-frequency signals.

MDA

Monday, September 2, 2013

REVIEW: Studio Projects LSD2

lsd2This is an unusual review, even for me.  I don't usually report on the actual guts of a microphone.  This mic  offered a rare opportunity, since it was defective and seemed to be hardly worth reviving.  The Studio Projects LSD2 is a large element condenser microphone.  It is, as best I can tell nothing more sophisticated than two Studio Projects C3 microphones in a single package.  Often, economically, it doesn't make sense to buy a stereo microphone unless you are unable to figure out mic stands.  The C3 costs about $269 (street).  The LSD2 costs about $700 (street), or 1.33 times the cost of two C3s. 

If you are a dedicated M-S or X/Y stereo recordist, you can make a lightweight case for owning a flexible stereo mic.  Often, I don't think the case holds up under serious scrutiny.  First, the price disadvantage is overwhelming.  Second, this is not a high-end, precisely matched instrument.  Third, the LSD2 is extremely fragile and somewhat undependable.  If you like the sound of the B3/C3, I think you're better served by buying four or five copies of either of those microphones for the flexibility and reliability.

The top element is connected to the electronics through a cheesy commutator/slip-ring mechanism.  The brushes are simply thin bent copper sheet metal and they do not move equally easy in two directions.  However, the element will be required to rotate in either direction, resulting in damage to the brushes and unreliable connection from the element to the electronics.  This is the biggest flaw in the ointment, but not the only one.

The previously reviewed Studio Projects’ B3 mics are notorious for unreliable switches.  The two slide switches that allow selection of polar pattern and response/padding are among the cheapest, most fragile switches I've ever experienced.  There are four of these switches on the LSD2.  If the contact ring doesn't get you, the switches will.

The mic is exceptionally heavy, putting a serious burden on any boom stand.  The Studio Projects shock mount is not up to the demands of this overweight mic.  In fact, the SP shock mount is a disappointment for any microphone application.  The keyed connector housing of the mic must be carefully misaligned with the slot in the shock mount housing, or the mic will slip from the mount and crash to the ground.  The wingnut doesn't tighten the clip down tight enough to hold the mic steady.   

On the upside is the sound.  Read my review of the Studio Projects B3 for more detail about the sound of that microphone.  The C3 is substantially better. This dual element condenser holds it's polar pattern for considerably further than typical distance.  M-S can be used for good sized rooms, as can Blumline and X-Y.  I've found this not to be true for a large number of programmable polarity mics at all price ranges. 

Supposedly, Studio Projects has fixed the problem with the connector ring.  If they have, this is certainly a price-attractive microphone for studio applications.  If they haven't, it's awfully expensive for a short  term solution.

NOTE: This package has expanded to other brands since this review was first written and posted (Avantone CK-40, Pearl Microphone Labs DS-60, and others). There are at least two companies labeling almost this exact package in their own brand . I suspect the faults and weaknesses I found in the LSD2 will be copied to the other brands, too.

Turns out, there is a fix for the commutator problems, assuming careful handling afterwards. For a school, I still think a stereo microphone is a poor choice due to the abuse it will assuredly see. However, the brushes are poorly stressed during the Chinese manufacturing process and the slip-ring is not lubricated. When I pre-stressed the brushes almost twice as far as the original bend and applied 100% Caig CalLube (now called deOxit FaderLube IT) to the contacts and slip-ring, the noise level on the upper element vanished to the same level as the lower element and, after three years of regular use in live recording situations, the microphone never failed to give good service.  Reassembly is tricky and if you are not spectacularly careful you can re-stress the brushes during assembly and lose any advantage gained from the process.

Wirebender Audio Rants

Over the dozen years I taught audio engineering at Musictech College and McNally Smith College of Music, I accumulated a lot of material that might be useful to all sorts of budding audio techs and musicians. This site will include comments and questions about professional audio standards, practices, and equipment. I will add occasional product reviews with as many objective and irrational opinions as possible.